Renovating a kitchen is one of the most complex home improvement projects a homeowner can undertake. Unlike painting a room or replacing a light fixture, a kitchen remodel involves plumbing, electrical, carpentry, tiling, and finish work that must happen in a precise sequence. The kitchen remodel order of operations in Dallas, TX is not just a best practice — it is the single most important factor separating a smooth renovation from one that blows the budget. Whether working with a kitchen remodels contractor or managing the project yourself, understanding the correct sequence upfront can save thousands of dollars and weeks of unnecessary stress.
Most homeowners assume that as long as each trade does its job well, the project will come together. What they miss is that even skilled tradespeople working out of order cause expensive rework. A plumber who rough-ins after flooring is installed damages the floor. An electrician who relocates an outlet after backsplash tile is set means tearing out tile. These are not rare accidents — they are predictable consequences of ignoring the order of operations.
Why Sequence Is the Real Budget Killer
According to the National Kitchen and Bath Association (NKBA), kitchen remodels are among the top three most complex residential renovation projects, and scheduling errors are a leading cause of cost overruns.
The logic is straightforward: every finished surface protects the rough-in work behind it. Once a wall is drywalled, painted, and tiled, accessing what is behind it becomes destructive and expensive. All mechanical, electrical, and plumbing work must be completed and inspected before any finishing work begins. Skipping ahead feels like progress in the moment but almost always requires undoing completed work.
The Correct 10-Step Kitchen Remodel Sequence
Understanding the full sequence from start to finish is the foundation of a well-run kitchen renovation. Here is the order that experienced contractors follow:
Step 1: Design Sign-Off and Permits Before a single wall is touched, the design must be fully finalized — cabinet layout, appliance locations, plumbing positions, and electrical plan. Changes made after permits are pulled can trigger additional inspections and fees. Local building departments in the Dallas area, like most municipalities, require permits for structural changes, electrical upgrades, and plumbing relocations.
Step 2: Cabinet Lead Time Order This is the step most homeowners and even some contractors overlook. Semi-custom and custom cabinetry typically carries a lead time of 4 to 12 weeks. If cabinets are not ordered immediately after design sign-off, the entire project schedule collapses. The construction phase can proceed, but the moment framing and rough-in are complete, everything stalls waiting on cabinets. Ordering cabinets on day one of a project is a non-negotiable scheduling move.
Step 3: Demolition With permits in hand and cabinets on order, demolition begins. Existing cabinets, countertops, flooring, and fixtures are removed. This phase also reveals hidden conditions such as outdated wiring, water-damaged subfloor, or plumbing that does not match plans — issues that must be addressed before moving forward.
Step 4: Structural and Framing Work Any wall removal, beam installation, or framing changes happen now, while the space is completely open. This is also when window modifications or the addition of a kitchen island base structure takes place.
Step 5: Rough-In Plumbing Plumbers relocate drain lines, supply lines, and add new stub-outs based on the finalized cabinet and appliance layout. This work happens before flooring is installed because it often requires cutting into the subfloor. According to This Old House, rough-in plumbing is one of the most commonly sequenced-wrong items in DIY kitchen projects.
Step 6: Rough-In Electrical and HVAC Electricians run new circuits, relocate outlets, and add dedicated lines for appliances. HVAC contractors extend or modify ductwork as needed. All of this work happens in the open wall cavities before insulation and drywall go up.
Step 7: Inspections Rough-in plumbing and electrical must pass municipal inspection before walls are closed. Skipping or rushing this step creates legal and insurance complications and can require walls to be re-opened later.
Step 8: Insulation and Drywall Once inspections are passed, insulation is added to exterior walls and drywall is hung, taped, mudded, and sanded. Painting of walls and ceiling occurs at this stage.
Step 9: Flooring Installation Flooring goes in after drywall and painting are complete but before cabinets are set. This allows full coverage without the complexity of cutting around cabinet bases — a detail that makes future cabinet replacements easier and produces a cleaner finished appearance.
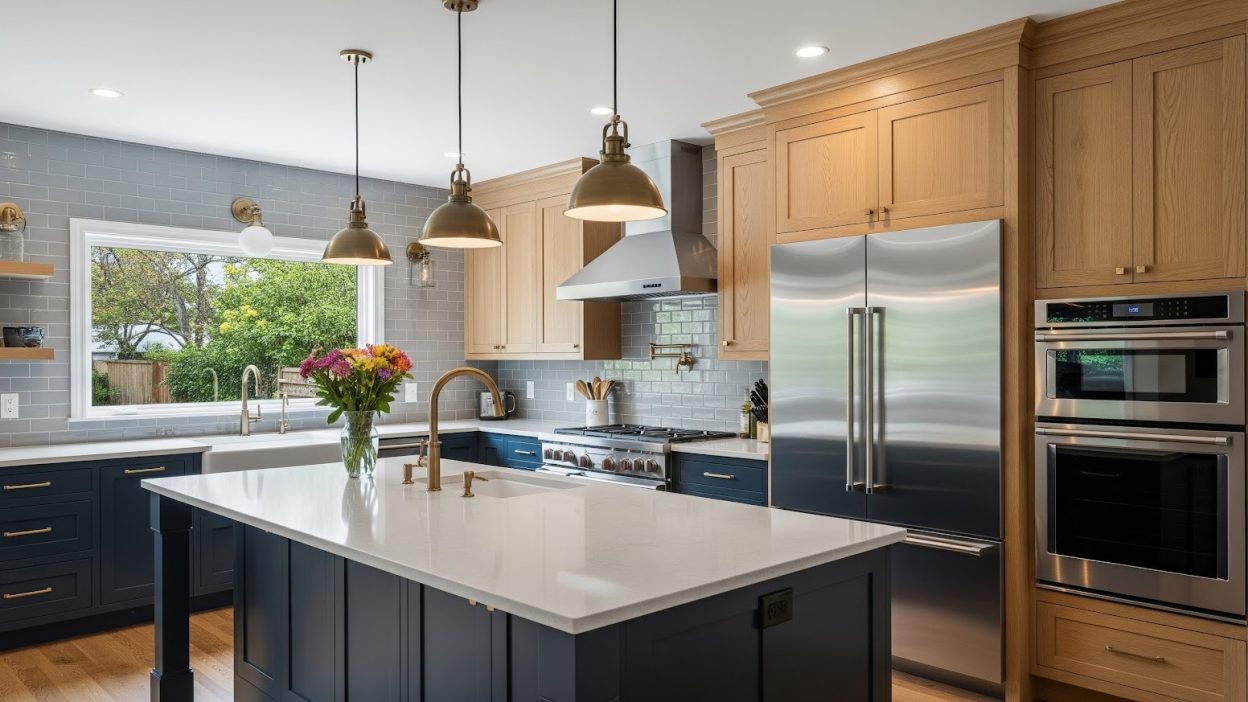
Step 10: Cabinet Installation, Countertop Templating, Backsplash, Fixtures, and Punch List Cabinets are installed and leveled. Only after cabinets are confirmed level and plumb does the countertop fabricator come to template. After countertops are installed, backsplash tile is set. Then plumbing fixtures, appliances, lighting, and hardware are completed. A final punch list walk-through identifies any touch-ups or corrections before the project is closed out.
Three Common Sequencing Mistakes That Derail Kitchen Projects
Experienced contractors frequently inherit projects started by others and find the same recurring errors. These three mistakes are among the most costly:
Mistake 1: Countertops Templated Before Cabinets Are Level
Countertop fabricators template from the installed cabinets. If cabinets are not perfectly level and plumb at the time of templating, the fabricated countertop will reflect those imperfections and will not sit flush. The result is either a countertop that rocks or one that requires cabinet shimming after the countertop is installed — and neither outcome is acceptable in a quality renovation. The fix is to fully complete cabinet installation and confirm levelness before calling the fabricator.
Mistake 2: Backsplash Tiled Before Electrical Is Relocated
Outlet and switch locations are sometimes adjusted after cabinets are installed because the cabinet configuration reveals conflicts with the original electrical plan. If backsplash tile is installed before this adjustment is confirmed, even a single outlet relocation means cutting through finished tile. This adds tile material cost, labor cost, and frequently results in a visible repair. Electrical relocations should be finalized and completed before a single tile goes on the wall.
Mistake 3: Appliances Delivered Before Framing Is Complete
Large appliances delivered before the space is ready create storage problems that frequently result in damage. A refrigerator sitting in a garage for three weeks while framing and drywall proceed is at risk of scratches, dents, and mechanical damage. Beyond storage issues, appliances on-site create congestion that slows every other trade. Coordinating appliance delivery to arrive when the space is ready keeps the job site clean and appliances undamaged.
How Smart Scheduling Aligns Material Arrivals With Construction Phases
The sequencing problem is not just about knowing the correct order — it is about aligning material lead times with each construction phase so that work never stops waiting on deliveries and materials never arrive before the space is ready for them.
Effective kitchen remodel scheduling works backward from the target completion date. Cabinet lead time is the longest variable, so it anchors the entire schedule. Once the cabinet delivery date is known, rough-in phases are scheduled to complete before that date, inspections are sequenced into the framing window, and flooring is ordered to arrive just before cabinets are set.
Countertop fabrication typically takes 1 to 2 weeks after templating, so templating is scheduled for the day after cabinet installation is confirmed complete. Backsplash tile, fixtures, and appliances are staged to arrive in sequence after countertops are installed.
This type of pull-schedule planning, where each material and trade is sequenced backward from the finish date, is what the Construction Management Association of America (CMAA) identifies as a key differentiator between residential contractors who consistently deliver on time and those who do not.
The practical benefit for a family is straightforward: a kitchen out of service for six weeks instead of fourteen is a fundamentally different renovation experience. Eating out three times a day for six weeks is manageable. The same expense over fourteen weeks becomes a significant unplanned cost on top of the renovation budget.
For homeowners in the Dallas area researching kitchen renovation contractors, TMC Construction Services on Google Maps provides location and contact details for scheduling a consultation.
Wrapping Up: Why the Order of Operations Is Worth Understanding Before You Start
A kitchen remodel is a significant financial investment, and the return depends heavily on how well the project is executed. Understanding the kitchen remodel order of operations before breaking ground helps homeowners ask better questions, evaluate contractor proposals more accurately, and make decisions that protect their budget.
The sequence exists because materials and systems in a kitchen are interdependent. Plumbing cannot be hidden behind drywall until inspected. Countertops cannot be fabricated until cabinets are level. Tile cannot go on a wall with pending electrical work. Each step creates the conditions for the next, and respecting that chain of dependencies is what separates a renovation that finishes on time and on budget from one that does not.
Homeowners who choose a contractor who follows the correct sequence consistently are the ones who end the project with the kitchen they planned and the budget they set.
Frequently Asked Questions
Q1: What is the most important step in the kitchen remodel order of operations?
Ordering cabinets immediately after design sign-off is the most critical step. Lead times of 4 to 12 weeks are the most common cause of project delays. If cabinets are not ordered on day one, the entire schedule compresses while waiting on delivery.
Q2: Can flooring be installed before cabinets in a kitchen remodel?
Yes, and it is the preferred sequence. Installing flooring before cabinets provides full, seamless coverage and avoids cutting precise angles around cabinet bases. It also simplifies future cabinet replacement since the floor extends under the cabinet footprint.
Q3: Why do countertop fabricators need to wait until after cabinet installation?
Countertop fabricators create a custom template by measuring the installed cabinets directly. If they template before cabinets are installed, they are working from dimensions that may not match reality. If cabinets are installed but not yet level, the template will reflect that and the countertop will not sit correctly.
Q4: How long does a typical kitchen remodel take when the correct sequence is followed?
A full kitchen remodel typically takes 6 to 10 weeks when properly sequenced. Projects that encounter sequencing errors, late material orders, or inspection failures commonly run 12 to 16 weeks or longer. Cabinet lead time is the primary variable.
Q5: Is it necessary to pull permits for a kitchen remodel?
In most jurisdictions, permits are required for plumbing relocation, electrical circuit changes, and structural modifications such as wall removal. Working without required permits can result in fines, required demolition of completed work, and complications when selling the home. Always verify requirements with the local building department before beginning demolition.